Showing posts with label Nugat haljina - Nougat dress. Show all posts

Nov 29, 2013

Rasprodaja kroja za Nugat haljinu / The Nougat dress sales


Dragi čitaoci, želim da vas obavestim da je u toku veliko sniženje cene kroja za Nugat haljinu, koje traje od danas, 29. Novembra 2013. do ponedeljka, 2. Decembra 2013. Tokom ova četiri dana kroj možete kupiti po ceni od 300 din, odnosno sa sniženjem od 40%! Za sve informacije o kupovini kroja, molim vas da mi pišete na adresu anajan.stepalica[at]gmail[dot]com.

Dear readers, I'm thrilled to inform you that there's a great sales of the Nougat dress pattern, that starts today, November 29th 2013 and end on Monday, December 2nd 2013. During these four days you can buy the pattern with 40% discount, meaning for $7.18! Visit my Etsy shop Stepalica Patterns and buy your copy of the Nougat dress pattern.

Takodje, pozivam vas da pogledate par blogova gde možete videti sašivene ili Nugat haljine koje su u procesu šivenja.

I also invite you to visit some blogs where you can find finished or in progress variations of the Nougat dress.


Karolin je prva koja je napravila haljinu po mom kroju. Njena snežno bela varijacija haljine je ispala fenomenalna! Uz divne slike njene haljine, možete naći i detaljnu kritiku kroja.
Karolin je kritiku kroja postavila i na sajt Pattern Review.

Carolyn was first to make the dress using my pattern. Her snow white variation of the dress turned out gorgeous! Along with pictures of her dress, you can find a detailed review of the pattern on her blog.
She also posted the pattern review to Pattern Review website.


EVERYTHING JUST SEW

Džudi polako ali sigurno napreduje sa svojom verzijom Nugat haljine. Ono što je sjajno kod njenih članaka su detaljni komentari na račun kroja, kao i saveti o tome kako da pojednostavite šivenje, i na šta da obratite pažnju prilikom rada. Nestrpljivo očekujem njen sledeći post!

Judy's making a slow but steady progress on her version of the Nougat dress. What's great about her posts are the detailed comments on the pattern, along with her advice on how to make the sewing simpler and what to pay attention to during the work. I'm looking forward to her next post!

STARCROSS SEWING

Stefani je sebi zadala veoma zanimljiv izazov - godinu dana ćšiti koristeći samo krojeve nezavisnih izdavača. Uz slike svojih kreacija, daje detaljne komentare i kritike krojeva koje je koristila, a pride možete i malo bliže da upoznate ljude koji stoje iza svake od kompanija čije krojeve oprobava. Novembar 2013. je posvećen Nugat haljini. Dok čekamo slike njene verzije, pročitajte intervju koji sam dala za njen blog, i prijavite se za nagradnu igru - možda osvojite kroj za Nugat haljinu!

Stephanie challenged herself to sew only indie patterns for a year. Along with pictures of her creations she posts detailed comments and reviews on the patterns she uses, and you can get to know the people who stands behind the pattern labels she's using. She chose Nougat dress for November 2013. While waiting for the pictures of her variation, read an interview I gave for her blog, and apply for the giveaway - you might win the Nougat dress pattern!

Sep 4, 2013

Nougat dress #1301 sewalong - Rezime / A resume

Miss Dibs je izvukla dobitnike kroja za Nugat haljinu. Čestitam svima, i nadam se da ćete uživati u kroju.

Miss Dibs has pulled out the Nougat dress giveaway winners. Congratulations to all of you, I hope you will enjoy the pattern.


I, samo da rezimiram, evo još jednom liste članaka o šivenju Nugat haljine:

And, to resume the Nougat dress sew-along, here is a list of the sew-along articles:
  1. Sastavite kroj / Assemble the pattern
  2. Isecite i podesite kroj / Cut and adjust the pattern
  3. Iskrojte materijal / Cut the fabric
  4. Sastavite gornji deo / Construct the bodice
  5. Prišijte romb sa naborima / Sew the gathered diamond
  6. Sastavite suknju / Assemble the skirt
  7. Sastavite haljinu / Assemble the dress
  8. Sastavite postavu / Assemble the lining
  9. Prišijte postavu za haljinu / Sew the lining to the dress
  10. Porubite haljinu i postavu / Hem the dress and the lining

Sep 2, 2013

Nougat dress #1301 sewalong - Porubite haljinu i postavu / Hem the dress and the lining

Dragi čitaoci, ovo je poslednji post o šivenju Nugat haljine, jer ćemo je danas porubiti i završiti. Priznajem, bilo je dosta posla i verujem da ste već nestrpljivi da što pre obučete svoju novu haljinu. 
Da li biste mi verovali kada bih vam rekla da sam ja svoju sašila za tri dana? Radila sam po ceo dan, u žurbi da počnem sa promocijom kroja. Trebalo mi je oko 30 sati da je napravim, od sečenja šnita do poruba. Nakon toga su me leđa bolela i vrtelo mi se u glavi :D, ali je haljina bila spremna za slikanje.
No, da ne duljimo priču, pređimo na zanimljiviji deo - porubljivanje!

Dear readers, this is the last post of the Nougat dress sew along series, today we'll hem and complete the dress.
Would you beleive me if I said it took me three days to complete my dress? I worked for three whole days, in a hurry to start promoting the pattern. It took 30 hours from cutting the pattern to hemming the dress. After that I had a horrible pain in the back and felt dizzy :D, but the dress was ready for the photoshoot.
Well, let's move to a more interesting part - the hemming!


Porubite haljinu / Hem the dress


Podestie bod na mašini na cik-cak, a dužinu boda na 0.5 mm. Obradite ivicu suknje. Ako ste koristili muslin, kao ja, moguće je da se do sada već solidno oparao. Otsecite končiće koji vire.

Set your machine to sew the zick-zack stitch, the stitch length being 0.5 mm. Serge the hem line of the skirt. If you used chiffon like I did, the fabric might have frayed a lot already. Cut off the frayed yarns.


Presavijte materijal na unutra, pregib neka bude što uži, pa pričvrstite slojeve špenadlama.

Fold the fabric inwards, with fold being as narrow as possible. Pin the fold in place.


Još jednom prođite ceo krug mašinom, istim bodom koji je podešen u prvom koraku. Bod na porubu bi trebalo da bude gust kao vez, ako nije, smanjujte dužinu boda dok ne postignete željeni rezultat.

Run the fabric through the machine once again, using the same stitch you set in the first step. The stitch should be very dense, like a satin stitch, so if it isn't as dense, reduce the stitch's length until you get the right settings.


Pnovite postupak na oba sloja suknje. Ovakav porub daje težinu inače laganom materijalu.

Repeat the process on both skirt layers. This kind of hemming gives some weight to this light and flowy fabric.


Porubite postavu / Hem the lining

Podesite bod na mašini na ravan štep, a dužinu boda na 2 - 2.5 mm. Postavite štep na 0.5 cm od ivice postave pa proštepajte postavu u krug.

Set the machine to sew a straight stitch, with the stitch being 2 - 2.5 mm long. Run the lining through the machine, sewing approximately 0.5 cm from the hemline edge.


Presavijte postavu na unutra, tako da pregib materijala bude duž proštepane linije. Pričvrstite materijal špenadlama, a potom prepeglajte porub, kako bi se materijal dobro ispresovao duž pregiba.

Fold the edge inwards along the stitched line. Pin the fold in place and press the hem.


Presavijte porub još jednom na unutra, pričvrstite materijal špenadlama i ponovo prepeglajte. Zatim proštepajte porub mašinom, postavljajući štep što bliže gornjoj ivici pregiba.

Fold the hemline inwards once again, pin it and press. Hem the lining, trying to sew as close to the upper fold line as possible.


Ovime ste napravili poslednji šav na vašoj haljini! Prepeglajte je još jednom i spremni ste da je nosite! Ne zaboravite da postavite svoje slike Nugat haljine u Stepalica Patterns grupu na Flickr sajtu!

And this was the last stitch you have made on your Nougat dress! Iron the dress once more and it's ready to wear! Don't forget to upload your photos of Nougat dress to Stepalica Patterns Flickr pool!


Huuuh, nakon Nugat haljine ću malo da odmorim... 

Pheeew, I'm gonna chill out after the Nougat dress....

(slika preuzeta sa sajta  / pic taken from


Prethodni postovi o Nugat haljini / Previous articles about the Nougat dress:
http://stepalica.blogspot.com/2013/08/nougat-dress-1301-sewalong-prisijte_30.html
http://stepalica.blogspot.com/2013/08/nougat-dress-1301-sewalong-sastavite_27.html
http://stepalica.blogspot.com/2013/08/nougat-dress-1301-sewalong-prisijte.html
http://stepalica.blogspot.com/2013/08/nougat-dress-1301-sewalong-sastavite_23.html
http://stepalica.blogspot.com/2013/08/nougat-dress-1301-sewalong-iskrojte.html

Aug 30, 2013

Nougat dress #1301 sewalong - Prišijte postavu za haljinu / Sew the lining to the dress

Još malo pa smo kompletirali Nugat haljinu. Ostalo je još da prišijemo postavu za haljinu i da porubimo sve slojeve skuknje. 
U današnjem postu bavićemo se postavom. Postupak koji ću opisati možete primeniti na bilo kojoj haljini bez rukava. Trudila sam se da uslikam što više fotografija, jer je bez njih veoma teško opisati neke od koraka. 

We have almost finished the Nougat dress. We need to sew the lining to the dress and to hem all layers of the skirt
Today we will work on the lining. The procedure I'll show you can be used on any sleeveless dress. I tried to snap a lot of photos, since this process is hard to describe without them.

Postavite lice postave preko lica haljine. Preklopite lepo slojeve duž izreza oko vrata i oko ruku. Špenadlama uhvatite slojeve zajedno.

Lay the lining over the dress with right sides together. Align the layers along the neckline and the armholes. Pin the layers together.


Proštepajte delove zajedno, zaustavljajući šav na par santimetara od linije ramena, kao i od bočnog šava u kom je rajsferšlus.

Sew the pieces together, stopping the stitch a few centimeters away from the shoulder line and from the left side seam, where the zipper is placed.


Opsecite dodatke za šavove duž proštepanih delova, ostavljajući ih široke 0.5 cm. Izendlajte ivice.

Cut off the SAs along the stitched lines, leaving them 0.5 cm (1/3") wide. Serge the raw edges.


Okrenite materijale na lice, izvrćući celu haljinu od iznutra ka spolja.

Turn the dress inside out.


Spojte prednji i zadnji deo haljine duž ramenog šava i raspeglajte šavove.

Sew the shoulder seams on the shell and press the seams open.


Sada spojte prednji i zadnji deo postave duž ramenog šava. Ovde ćete morati da izvrćete delove postave kako biste mogli da napravite šav sa naličja materijala.
Primetite da su i sa spoljne i sa unutrašnje strane svake od bretela haljine ostale rupe u šavu.

Now sea the shoulder seams on the lining. You will need to twist the lining in order to make a stitch on the wrong side of the fabric.
Note that there are unfinished seams left on armholes and neckline.


Izvrnite haljinu od spolja ka unutra, pri tom je izvrćući između dva sloja. Cilj je da izvrnete haljinu tako da možete da priđete ramenom šavu i prošijete preostale šavove.

Flip the dress outside in, by flipping it between the two layers. The goal is to flip the dress so that you can reach the shoulder seam and sew the unfinished seams.


Dakle, izvucite bretelu što više, tako da su haljina i postava postavljene licem ka licu, i prošijte šavove oko otvora za glavu i ruku. Opsecite višak dodataka za šavove i izendlajte ivice.

Pull the shoulder strap as much as you can, having the shell and lining fabrics with right sides together and sew the seams on neckline and armholes. Cut off the extra width of the SAs and serge the seams.


Kada ste kompletirali obe bretele, izvrnite ponovo haljinu, obrćući slojeve ka licu materijala.

When both shoulder are finished, flip the dress again, inside out.


Sada treba da zašijemo postavu za dodatke za šavove duž rajsferšlusa.

Now you need to finish the lining along the zipper.


Otvorite rajsferšlus do kraja. Sa svake strane rajsferšlusa uhvatite postavu za bočni šav uz pomoć špenadli. Pri tom, presavijte ivicu postave na unutra toliko da glava rajsferšlusa ne hvata materijal prilikom zatvaranja. Obeležite na postavi koliko je potrebno da se savije ivica šava.

Open the zipper, and pin the lining to the zipper band. Fold the lining edge inwards so that the zipper head doesn't get caught in the fabric when the zipper closes. Mark the amount of the edge fold on the lining.


Opet izvrnite haljinu, od spolja ka unutra, tako da su postava i haljina okrenute jedna ka drugoj licem ka licu. Špenadlama uhvatite postavu i haljinu duž trake rajsferšlusa, tako da se on nalazi između dva sloja materijala. Proštepajte slojeve zajedno, duž linije obeležene u prethodnom koraku.

Flip the dress once again, outside inwards, having the shell and lining with right sides together. Pin the zipper to the dress along the zipper band, so that the zipper band is sandwiched between the two layers of fabric. Sew the layers together, along the line marked in the previous step.


Presavijte vrh rajferšlusa tako da sloj postave bude unutar pregiba, a sloj haljine sa spoljne strane pregiba. Zaršvite započeti šav duž otvora za ruku, šijući iznad samog graničnika na rajsferšlusu.

Fold the zipper band at the top, so that the lining layer is inside the fold and the shell is outside the fold. Finish the armhole seam, by sewing above the zipper's top tab.


Izvrnite haljinu na lice. Ponovite opisani postupak na drugom kraju rajsferšlusa.

Flip the dress inside out. Repeat the process for the other zipper's side.


Zatvorite rajsferšlus i proverite da li se gornje ivice poklapaju. Prepeglajte bočni šav i sa lica i sa naličja.

Close the zipper and check if the top edges are well aligned. Press the side seam by pressing from both right and wrong side of the dress.


Da biste pričvrstili postavu na mestu kako ne bi virila napolje duž otvora za glavu i ruke, proštepajte zajedno postavu i dodatke za šavove duž ovih otvora, tik uz liniju otvora. Ja to obično radim ručno, sitnim i gotovo neprimetnim bodom, jer mi se on više sviđa od mašinskog boda, a i daje mi mogućnost da priđem čak i onim delovima koji su mašini nepristupačni.

In order to secure the lining from peeking out at the neckline and armholes, you need to edge-stitch the lining to the SAs. I usually do this by hand, using tiny and almost invisible stitches, just because I like it better this way. Also, it gives me an access to some areas that aren't reachable when usgin the sewing machine.


Prepeglajte otvore za glavu i ruke.

Press the armholes and the neckline.


U sledećem postu ćemo porubiti postavu, kao i oba sloja suknje. Još malo i gotovi smo!

We will hem the lining and both layers of the shell in the next post. We're almost done!


Prethodni postovi o Nugat haljini / Previous articles about the Nougat dress:
http://stepalica.blogspot.com/2013/08/nougat-dress-1301-sewalong-sastavite_29.html
http://stepalica.blogspot.com/2013/08/nougat-dress-1301-sewalong-sastavite_27.html
http://stepalica.blogspot.com/2013/08/nougat-dress-1301-sewalong-prisijte.html
http://stepalica.blogspot.com/2013/08/nougat-dress-1301-sewalong-sastavite_23.html
http://stepalica.blogspot.com/2013/08/nougat-dress-1301-sewalong-iskrojte.html

Aug 29, 2013

Nougat dress #1301 sewalong - Sastavite postavu / Assemble the lining

Do sada smo sastavili haljinu i prišili rajsferšlus na Nugat haljini. Sada je vreme da počnemo da radimo na postavi. 
Ako šijete varijaciju C haljine, danas ćete i vi početi da šijete. Pošto su krojni delovi za haljinu i postavu identični, korake koje u ovom postu opišem ćete primeniti na oba sloja.
Setite se da smo, kada smo krojili delove za haljinu, kroj postavljali na lice materijala. Sa delovima za postavu je suprotno, tj. kroj treba da postavljate na naličje materijala, kako biste dobili postavu koja je nalik na odraz u ogledalu vaše haljine.
Ovaj post neće biti previše detaljan, budući da je većina postupka šivenja postave veoma slična (ako ne i ista) onom koji smo primenili kada smo sastavljali haljinu. Opisaću osnovne korake i dati napomene za one korake koji se razlikuju od opisanih.

We have assembled the dress and sewed in a zipper on the Nougat  dress so far. Now it's time to start working on the lining.
If you're making view C of the dress, you'll start sewing today. Since the pattern for the shell and lining are identical, you will use the same process I'll describe here for both layers. 
Remember that we laid the pattern pieces on the right side of fabric when we cut the shell. Well, we'll do the opposite with the lining and lay the pattern pieces on the wrong side of the fabric in order to get a lining that is a mirror image of the shell.
This post won't be a very detailed one, since most of the steps I described when assembling the dress can be applied to the lining. I will describe basic steps and point out those that differ from the ones I have already described.

Iskrojte krojne delove za postavu / Cut the lining pieces


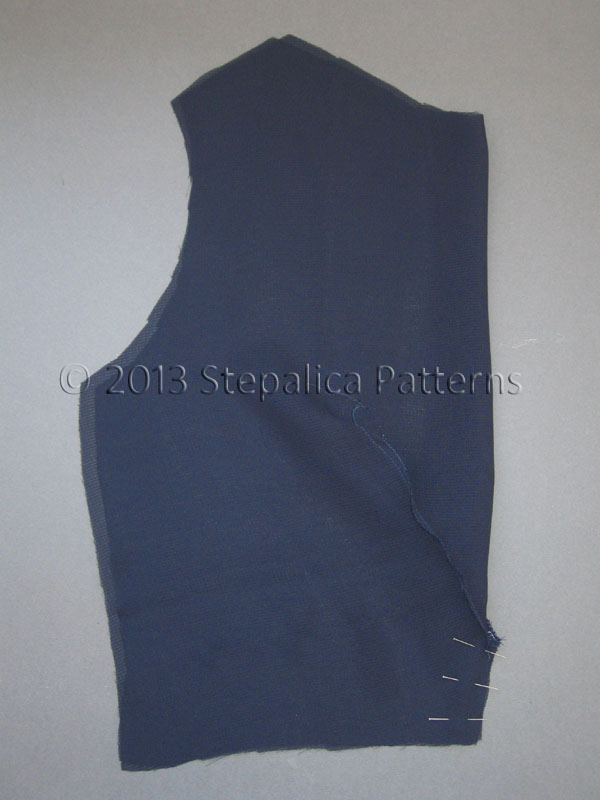
Iskrojte krojne delove za postavu. Prednji i zadnji gornji delovi imaju brusne koje je potrebno obeležiti na tkanini. Kao i kod ostatka kroja, ni ovde nisam koristila kredu za obeležavanje kroja.

Cut the lining. Bodice panels have darts that need to be marked on the fabric. Like on the rest of the pattern, I haven't used tailor's chalk either for transferring the pattern.


Umesto krede, mnogo bolji način obeležavanja brusne je takozvanim labavim fircom, koji izgleda kao na slici. Labavi firc je bod koji se šije kroz oba sloja materijala. Umesto da zatežete konac, potrebno je da ostavite podužu petlju izmeđju svaka dva boda.

Instead of using chalk, I used a much better way of marking - tailor tacks, which looks like shown on the picture below. It's sewn through both layers of fabric. While hand basting you need to loosen the thread and leave a loops in the stitch.


Kada ste obeležili brusnu, sklonite papirni kroj i pažljivo povucite slojeve tkanine u suprotnim smerovima, kako bi se konac zategao na površini svakog od slojeva.

Once you have marked the dart, remove the paper pattern and pull carefully layers of the fabric in opposite directions, until the thread is tightened on their surfaces.


Prosecite konce između slojeva i razdovjte slojeve. Dobili ste precizno obeležene brusne.

Cut the peaking threads and separate the layers. You've got some precisely marked darts.


Ponovite postupak i na prednjem panelu.

Repeat the process on the front panel.


Sašijte prednji gornji panel / Sew the front bodice


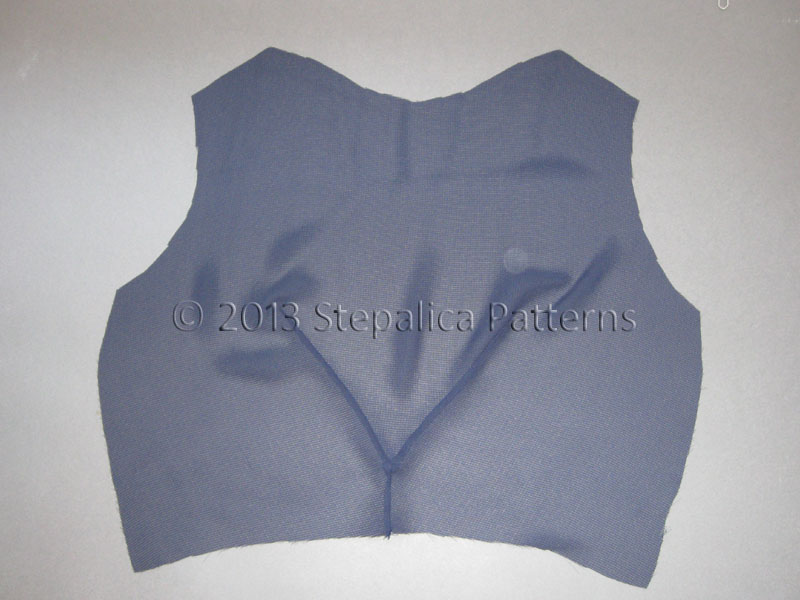
Brusne na prednjem delu šijte jednu po jednu. Presavijte po dužini brusnu na pola i pričvrstite slojeve špenadlama. 

Sew darts on the front bodice one by one. Fold the dart in half along its length and pin the layers in place.
  

Prošijte brusnu, otsecite višak materijala, ostavljajući dodatke za šavove širine oko 0.5 cm. Izendlajte ivice i uklonite firc.

Sew the dart, cut off the extra fabric leaving 0.5 cm (1/3") wide SAs. Serge the raw edges and remove the basting thread.


Ponovite opisani postupak i sa drugom brusnom.

Repeat the process on the other dart.


Završite gornji panel kratkim šavom od spoja dveju brusni do linije struka.

Finish the front bodice by sewing a short seam from the darts' joining point to the waist line.


Raspeglajte brusne i šavove.

Press the darts and seams.


Sastavite ostatak postave / Assemble the lining


Prošijte brusne na zadnjim gornjim panelima i prepeglajte ih. Sastavite zadnje panele duž centralnog zadnjeg šava. Izendlajte ivice i raspeglajte šavove.

Sew the darts on back bodice and press them. Sew the back panels together, by stitching along the center back seam. Serge the raw edges and press the seams.


Sastavite suknju - prišijte pojas za suknju.  Izendlajte ivice i raspeglajte šavove.

Assemble the skirt - join the waist yoke and skirt panels. Serge the raw edges together and press the seams.


Sastavite prednju i zadnju stranu haljine.

Assemble the back and front dress panels.


Sastavite prednju i zadnju stranu haljine. Poravnajte delove u liniji struka, a zatim i ostatak bočnog šava. Desni šav prošijte od pazuha do poruba suknje.

Sew the back dress panel to the front. Align the waist line seams on front and back, and then align the rest of the seam's length. Sew the right side seam from the armhole down to the hemline.


Levi bočni šav prošijte od linije kuka do poruba suknje. Izendlajte ivice duž svih šavova i raspeglajte šavove.

Sew the left side seam from the hip line to the hemline. Serge all the raw edges and press the seams.


Na žalost, zaboravila sam da uslikam sašivenu postavu. Primetite da sam ostavila nesašivene ramene šavove i na haljini i na postavi. Sada ste spremni da spojite postavu sa haljinom, a to ćemo raditi u narednom članku.

Unfortunately, I forgot to snap some photos of the finished lining. Note that I left the shoulder seams un-sewed on  both the shell and the lining. Now you're ready to attach the lining to the shell. We'll do that in the next post. 


Prethodni postovi o Nugat haljini / Previous articles about the Nougat dress:
http://stepalica.blogspot.com/2013/08/nougat-dress-1301-sewalong-assemble.html
http://stepalica.blogspot.com/2013/08/nougat-dress-1301-sewalong-sastavite_27.html
http://stepalica.blogspot.com/2013/08/nougat-dress-1301-sewalong-prisijte.html
http://stepalica.blogspot.com/2013/08/nougat-dress-1301-sewalong-sastavite_23.html
http://stepalica.blogspot.com/2013/08/nougat-dress-1301-sewalong-iskrojte.html